Do-it-yourself French manicure
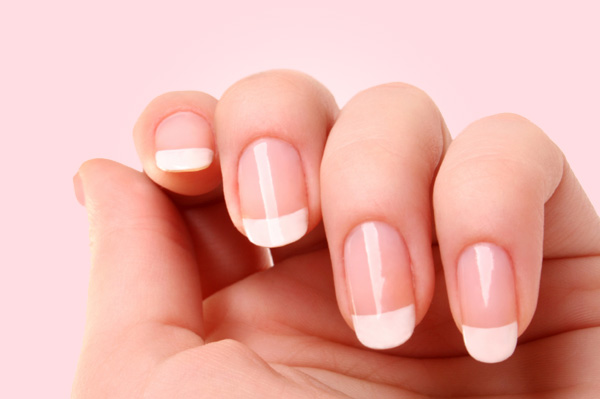
The pale pink base and bright white tips characterize the ever-popular French manicure,This procedure is best performed on a lazy morning or evening when no other pressing errands or tasks will get in the way. After painting your nails, avoid doing things with your hands while they dry.
*Keeping longer, healthy nails will be most conducive to sporting a French manicure. To complete your own French manicure, begin with the following steps to prepare your nails for the procedure:
*Using a cotton ball soaked in nail polish remover, wipe off any old nail polish prior to painting nails. Wash hands and soak in warm water for a few moments.
*With an orange wood stick, gently push back the cuticles so they are all even with each other once the water has softened your skin.
*With nail clippers, beauty scissors or a nail file, shape your nails evenly.
*With a steady hand, carefully paint only the tip of each nail with a white hue. A second coat may be desirable, depending on the thickness and opaqueness of the polish. Allow polish to dry between coats.
*Using a slightly transparent pink or nude color, paint the entire nail once the tips have dried. A second coat may be necessary. Allow nails to dry thoroughly.
*Once all the coats have dried, apply a clear topcoat to protect your new French manicure. To lengthen the manicure's lifespan, make an effort to paint a clear coat on each night. Be sure it has ample time to dry completely.
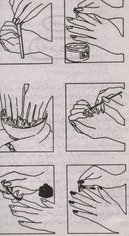
Do it your self Manicure
A fresh manicure helps you look clean and put-together. But professional manicures can be expensive and time-consuming. Why go when it's cheaper and looks just as great when you do it yourself?
*Remove any old nail polish. Use nail polish remover and cotton balls.
*Use nail clippers and trim your nails. Don't cut them too short, you should be able to see at least a little of the white tip still, all the way across. Using a nail file, file the nail and create a smooth and clean shape. Clean dirt from inside the nails.
*Using a white block of a stick-type nail buffer, or a pad-type nail buffer and buffing powder, buff the surface of the nail a little bit to even out the surface and to smooth out ridges. Remember not to buff too much: you're grinding at the nail; thinning it too much will weaken it. Perfect edge-to-edge flatness is not practical or necessary. A soft, flexible buffer will more easily buff the sides of the nail along with the middle.
*Get a bowl or stopper the sink and fill it with warm (not hot!) water and a few drops of soap. Soak your hands only for a few minutes. The water and soap will help to loosen dirt, dead skin, and any dust left over from filing and buffing, and soften cuticles
*Dry nails and apply a cuticle cream. Using a cuticle pusher, also called an orange stick, gently push back the cuticle. Do not force them back.
*Take a lotion or hand cream and massage it into your hands for 5 minutes. If you have very dry skin use an intensive lotion,
*Lastly begin painting nails using a thin coat. Dip the brush into the bottle of polish and as you remove it.
Manicure Procedure
|
Pedicure Procedure
|
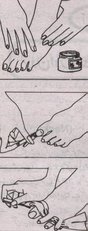
Give Your Feet a Makeover
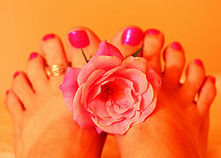
Your feet work harder than you give them credit for. It's time to give them a well-deserved treat. Just follow these easy steps.
*Remove the old Nail Polish.
*Buff the calluses and dry skin on your feet with an emery board. Use gentle back and forth strokes to remove the dead, dry outer layers. Do this before putting the feet in the water bath.
*Soak the feet in a warm foot bath for at least five minutes. You may add salt or other detergent products that soften the skin if you wish.
*File your nails and remove the dirt from inside the nails.
*Scrub your feet with a gentle brush. Rub pumice stone or foot scrapper to remove stubborn dirt and excess skin. Multiple scrubbings with gentle pressure get much better results.
*Push back the cuticles.
*Lift one foot out of the water and apply exfoliation cream in small circular motions.Massage your legs for 5-10 minutes.
*Wipe your legs and apply your favourite nail polish.
Remember to wax your hands and legs add extra beauty to your hands and legs.
Waxing removes the unnecessary hairs and makes the skin soft and and gives it a fair look. Waxing is a good way of removing unwanted hairs as from this procedure hairs comes out from their roots if you keep on using this method it will reduce the hair growth gradually.
Make your own wax
2 cups sugar
¼ cup water
¼ cup lemon
Mix the ingredients together, and pour it in a saucepan. Heat it over a low flame, and keep stirring until it turns a brownish amber. The mixture shouldn't be runny, but it shouldn't be too hard either. Make sure all the sugar has melted. When you are done, test the temperature. It should be hot, but comfortable on the skin. Use a tongue depressor/ popsicle stick and apply to skin. Make sure skin is clean.
Apply talcum powder and use a smooth cotton or muslin strip on the skin the direction the hair grows. Let it cool just slightly, and yank it off close to the skin in the opposite direction. Press on your skin to relieve pain, and rinse with water to remove the wax. Sooth it with moisturizer.
